Announcement! More Amazing Tricks yet to be published After a Month!

Will be back soon! Dear Readers,

In order to get more familiar with Search Engine Optimization and CSS and HTML, I have decided to take some professional classes. Currently I am working on a project and am badly busy. I will continue blogging just after a month. I am thankful to everyone for supporting and promoting this blog. I will be back with more interesting, successful and professional tips and tricks. Till then take good care of yourselves.

Regards,

MOHD

Please don’t hesitate to post your demanded tricks in the comment form below. I will serve the first comment first!

More

Woohoooo! Got PageRank 1.0 and 30 reviews in just a month!!

woohoo! A PageRank 1 and a beautiful review I am extremely excited at the moment. My newly born blog made it to Google Page Rank 1.0 in just one month! I published My Blogger Tricks on March 2009 and thanks to God, just within a month it started gaining popularity in blogosphere. It received 1300 hits with impressing bounce rates. The little baby also succeeded in achieving 30 reviews within a month among which is the highly remarkable review written by Joella. To read the review on “MBT” written by Joella please Click here, Review by Joella!

Joella is the author of blog with wings which is a pretty useful site equipped with dozens of tips and tricks a beginner and pro blogger will wish to read. She is the right person to approach when it comes to taking blogging advice. She discusses a range of topics, which includes ,
  • Blog Layout & Design
  • Blog Promotion
  • Blog Success Strategies
  • Blog Writing Style
  • Blogging For Beginners
  • Free Blog Widgets
  • Free Blogging Software
  • Free Online Blogs
  • Make Money Online
I thank all my readers and reviewers for reading, supporting and promoting TNT by STC. I will strive much harder to serve you all to the best of my ability. Each Month will be welcomed with a PR Increase InshAllah :)
Update:- Just after 25 days of this post, I received a PR 2.0. My wish came true :D
Take care and hurray to My Blogger Tricks apploud
More

Add a Cool Feed Icon and Subscription Email Form To The Sidebar of Your Blogs (ll)

Cool-RSS-Email-Form As I had promised in my previous post, I am now sharing the trick of adding a beautiful subscription form to the sidebar of your blogs. Check out my email form just below the RSS Feed Icon at my sidebar on your right..

A Subscription Email form is more important than a RSS feed Icon itself. People often love to receive your post Updates in their email inbox rather than in a reader. So make sure you make your Email From as eye appealing and eye catching as possible. So today we will again learn how to plant the TNT of an Email form, so lets get to work!

Follow these steps,

  • Log into your feedburner account
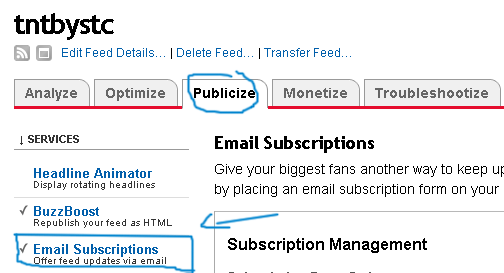
  • Click on the Publicize button and then click on Email Subscriptions link as shown below,

subscription-email-form


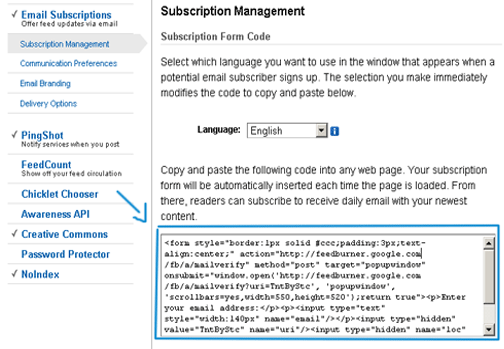
  • Then drag down the page until you see a HTML code, as shown below

email-form-code

  • Copy the HTML code for the email form and paste it in a WordPad or Notepad. The  code may look like the one below,

<form style="border:1px solid #ccc;padding:3px;text-align:center;" action="http://feedburner.google.com/fb/a/mailverify" method="post" target="popupwindow" onsubmit="window.open('http://feedburner.google.com/fb/a/mailverify?uri=TntByStc', 'popupwindow', 'scrollbars=yes,width=550,height=520');return true"><p>Enter your email address:</p><p><input type="text" style="width:140px" name="email"/></p><input type="hidden" value="TntByStc" name="uri"/><input type="hidden" name="loc" value="en_US"/><input type="submit" value="Subscribe" /><p>Delivered by <a href="http://feedburner.google.com" target="_blank">FeedBurner</a></p></form>

Please search for the Green and Red texts as shown above in the HTML code that you just pasted in a notepad or WordPad.

Note that the red text in your code will be something like this,

http://feedburner.google.com/fb/a/mailverify?uri=Your-FeeD-Title

The end part of the URL above will contain your feed title, so look carefully for this URL in the code that you pasted in notePad

  • Now Log into your Blogger account and go to Layout > Page Elements

page-elements

Then Click on Add a Gadget

add-a-gadget

Then Choose HTML/JavaScript

html-javascript

  • Now Copy and paste the code below into HTML/JavaScript widget.

 
<div style="border: 1px solid DodgerBlue; padding: 5mm;">
<center><img src="URL of Email Icon"/></center>
<span style="font-weight: bold;font-size:small;">Subscribe by E-mail & receive free updates of these cool Tips N Tricks straight to your inbox!</span>

<form action="http://feedburner.google.com/fb/a/mailverify" style="padding: 3px; text-align: center;" target="popupwindow" method="post" onsubmit="window.open('http://feedburner.google.com/fb/a/mailverify?uri=TntByStc', 'popupwindow', 'scrollbars=yes,width=550,height=520');return true"><center style="font-weight: normal">Enter your email address:</center><p><center><input type="text" style="width:140px" name="email"/></p></center><center><input type="hidden" value="TntByStc" name="uri"/><input type="hidden" name="loc" value="en_US"/><input type="submit" value="Subscribe" /></form></center>

NT:- The Code in your notepad will be used only to get some info out of it. Our main code is the code above.

Please adjust the code according to your preferences in the following way,

  1. DodgerBlue : This refers to the colour of the frame/outline surrounding the Email form, You can change it to any colour. For example, White, Black, Red , Green etc.
  2. URL of Email Icon : This refers to the URL of your Email Icon. Please first choose a Email Icon of your choice by clicking here Once you have download your Email Icon, upload it to Photobucket and get the URL for it. Then simply replace the text URL of Email Icon with your Email Icon URL.
  3. http://feedburner.google.com/fb/a/mailverify : Replace this text with a similar URL in your code that you had copied in a notepad.
  4. http://feedburner.google.com/fb/a/mailverify?uri=TntByStc : Replace this URL with the URL in the notepad code.
  5. The bolded Black Text refers to the text that appears below your Email Icon and above Email form. You can change it to anything that suits your blog topic.
  6. TntByStc: Replace this text with your Feed Title. I hope you know what’s your feed title if not then read this post
  7. Subscribe : This is the text that appears on the Email button. You can change it to anything you like. For Instance: Submit, Hit Me!, Join Me! etc.

Once you have adjusted the code according to your preferences, simply click the Save button in the HTML/JavaScript Widget.

Now visit your blog to see a pro looking Subscription Email Form hanging on your sidebar :)

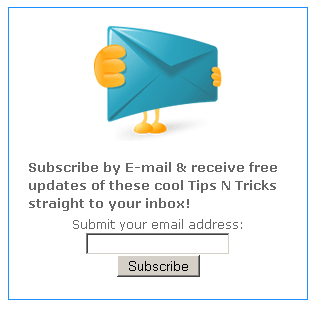
Just like the one below,

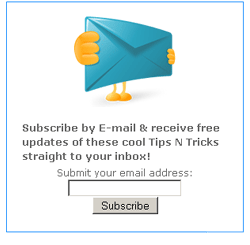
email-subscription--form

I hope it works for you. Enjoy!

More

Add a Cool Feed Icon and Subscription Email Form To The Sidebar of Your blogs (l)

Add-a-feed-Icon-To-Sidebar Many of my friends and loyal readers had emailed me and asked me that how did I add that RSS Feed Icon to my sidebar along with that Email Subscription form. So I decided that why not write a post on it this afternoon. Since this post is a bit long, I will complete it in two parts. In this part of the post I will share the trick of adding an attractive RSS Feed Icon to the sidebar of your blogs. 
So without wasting any more time lets learn how to plant this TNT.


Well to let visitors subscribe to your feeds (Feeds = Posts or Comment Updates) via a feed reader or an email, you must sign up for an account at feedburner.com which is a wonderful web service that gives you widgets, stats and complete control over your feeds.
So assume that you have sign up for an account at feedburner.com  and have your feeds burned. Your feed URL will now look like this,

http://feeds2.feedburner.com/TntByStc
Instead of tntbystc you will use the title that you chose for your feeds while creating an account at feedburner.com
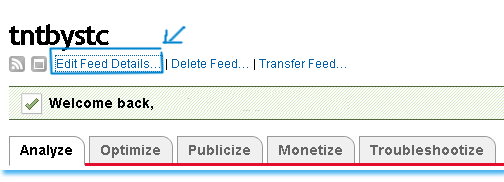
To get your Feed URL, Log into your Feedburner Account and click on Edit Feed Details as shown below,
edit-feed-details  On clicking it you will see the following details,
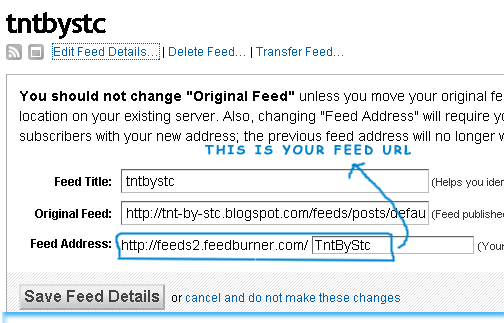
FEED-URL
You can see in the image above that your feed URL will be something like http://feeds2.feedburner.com/Your Feed Title
Simply Copy your Feed URL on to a notepad or WordPad because we will need it later on this post.
Lets now learn how to add a beautiful RSS Icon to Your Sidebar

Steps To be Followed


  • You would love to know how to replace that ugly Feed Icon with your Custom one(I hope you have uploaded it as guided above) and to add some text below that Feed Icon and to surround your Feed Icon and Text in a coloured Frame/Outline (just like mine!) …etc…etc… Well if you really wish to know how to do it, so lets do it by using my custom code below,
<div style="border: 1px solid DodgerBlue; padding: 5mm;">
<span style="font-weight: bold;">Remain updated by subscribing to my</span>
<a href="URL of Your Feed Address" target="_blank">Regular Feed Updates</a>
<center><a href="URL of Your Feed Address" target="_blank"><img src="URL of Your Feed Icon" title="Receive Free updates by clicking here!"/></a></center></div>
In the code above remember to replace the Green text with your Feed URL that you just copied in a notepad or WordPad.
You can change the bolded Black text to anything you like. This text will appear above your feed Icon.
Replace the Red text with the URL of your RSS Feed Icon ( I hope you have uploaded your feed icon as guided above)
The Blue text appears when someone hovers his mouse cursor on your Feed Icon (Hover your mouse cursor on my feed icon and you will see a snippet with the following text in it Receive free TNT updates by clicking here! )
DodgerBlue refers to the colour of the frame which will surround your RSS Icon, you can change it to any colour you like for example you can replace it with White, black, red, green etc.
Once you have understood everything then do the following,
  • Copy the code above
TNT Tip: Press Ctrl + A to select the entire code and then press Ctrl + c to copy the entire code.
  • Now after you had copied the code simply log into your blogger account and go to  Layout > Page Elements
page-elements
Then Click on add a Gadget
add-a-gadget
Then choose HTML/JavaScript
html-javascript
  • simply paste the code into the HTML/JavaScript (make sure you have adjusted the code according to your liking)
  • Hit save!
Visit your blog and you will see a beautiful RSS Icon surrounded by a coloured frame/outline as shown below,
Remain updated by subscribing to my Regular Feed Updates
Receive Free updates by clicking here!
Don’t worry about the width of that outline, it automatically occupies all the space available  in your sidebar.
I will let you know how to add a Subscription Email Form just below this RSS Icon on my next post. Till then enjoy the little panda :)
Please let me know if you are facing difficulty in understanding any step.
More

Learn How To Show Post Summary using The “Read More Link” or “Continue Reading link”


Update: You don't need to follow this long method now. To add a read more or jump break anywhere on your post simply switch to "HTML" mode of your editor and paste this code in it:
<!--more-->
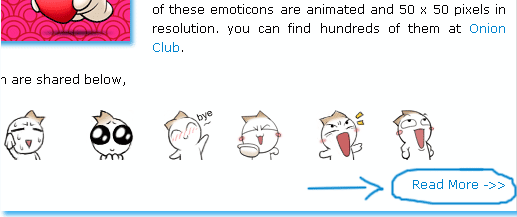
Totally Exceptional!! A good blogger can be identified by the way he manages his blog and organizes his posts. The homepage is the most important part of every blog. The homepage must contain up to 5-6 posts in order to seize the attraction of reader as much as possible. Keeping a reader busy for a longer time is what I call a blogging success. Showing 5-6 posts is load-time and user friendly only if you show a summary of each post. On my homepage you must have seen a Read More Link, clicking which expands the entire post. Look at a screen shot Below,

read-more1
This link just adds beauty to your blog along with some pro spice to it. So lets learn how to summarize your posts and give them the expandable functionality.
The steps that must be followed for planting this TNT are,
  • Go to layout > Edit HTML
layout-edit-html

Now The Most Important Step –> Back Up Your Template
By backing up your template I mean that you must save a copy of your current template in your computer hard drive. If in case something goes wrong, you can restore your template and have everything working as normal as before.
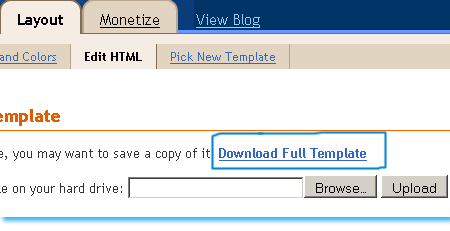
To backup your template click on the link saying Download Full Template , as shown below
backup-template
If suppose something goes wrong , you will simply click the Browse button, locate your saved template and then simply click the Upload button to restore your template back to normal.
  • Click on "Expand Widget Templates" at the top right hand corner of your Edit HTML page
expand-widgets
  • Now find this code ]]></b:skin> 
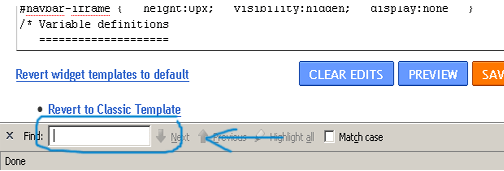
Tip: Pressing Ctrl + F  and then paste this code into the search box, as shown below,
Search-code
The search box is an easy way of finding codes in your template.
  • Just after ]]></b:skin> copy paste the code below,
Tip: Highlight the code below and then press Ctrl + c to copy the entire code and then press Ctrl + v to paste the code
<style>
<b:if cond='data:blog.pageType == "item"'>
span.fullpost {display:inline;}
<b:else/>
span.fullpost {display:none;}
</b:if>
</style>

  • Now find this code  <data:post.body/>
And just after <data:post.body/> add the code below,
<!--READ-MORE-STARTS-->
<b:if cond='data:blog.pageType != "item"'>
<a expr:href='data:post.url'>
<div style="text-align: right;">Read More ->></div></a>
</b:if>
<!--READ-MORE-STOPS-->
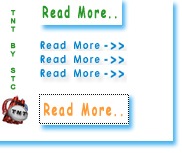
You can replace the text in red with anything you like, e.g: Continue Reading, Keep Reading
If you want to shift the "Read More->>" text to the extreme-left side, use this code:
<!--READ-MORE-STARTS-->
<b:if cond='data:blog.pageType != "item"'>
<a expr:href='data:post.url'>
<div style="text-align: left;">Read More ->></div></a>
</b:if>
<!--READ-MORE-STOPS-->
  • Save your template and you are Done!

Read Further to know How to Apply this TNT in your Posts
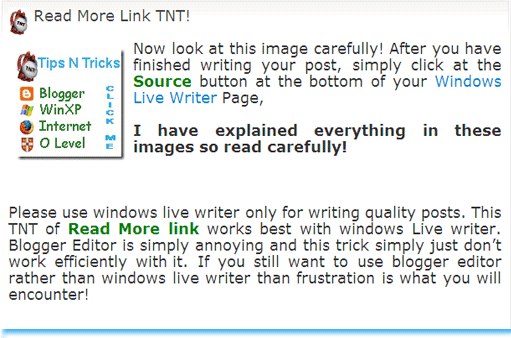
Now whenever you want to write a post in windows Live Writer, follow the procedure below,
  • Once you had finished writing your post, as shown below,
Readmore1
  • Just after completing your post click on the source button at the bottom of your windows live writer page,
readmore2

UPDATE: Instead of trying the long method below, there is an easy shortcut. Wherever you want the read more link to appear, simply paste this code there:
More

Twitter Recent Posts Widget For Blogger Blogs

twitter-recent-post-widget- As I promised in my post on Feedburner Recent Posts Widget I am here to share the trick of adding a Twitter Recent Posts Widget. This widget will undoubtly add a pro touch to your blog, see it in action by Clicking Here! Many Newbie bloggers use a JavaScript Recent post widget to there blogs but to keep your blog distinct you must either choose Feedburner or Twitter. Twitter is a nice place to attract a huge traffic if used intelligently. Adding the twitter recent post widget will surely increase the number of your followers and indirectly the traffic to your blog. So now before wasting any more time, lets get to work!

This widget requires two things

  1. Sign up for twitter Feed 
  2. A twitter account ( Which is Obvious :D )


1.  Sign up for twitter Feed

For your latest posts to be shown in twitter widget you must submit your RSS feeds to a free web service called twitterfeed  They will post your latest blog posts along with the title and description in your twitter account for free! You just sit back and relax.

This is what you need to do,

1. Visit twitterfeed 

twitterfeed

2. Create an OPen ID to sign up for a twitterfeed account

OpenId is an Id just like your blogger Id that lets you log into thousand’s of web services without the need of signing up for an account. In short its a free ticket that lets you take a complete ride of thousands of remarkable websites that accept OpenId and luckily blogger and twitterfeed  is one of them.

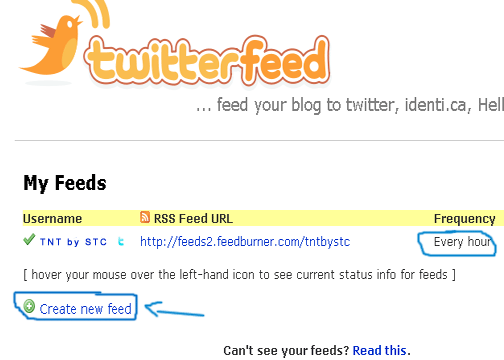
3. Once you have created your OpenId, log into twitterfeed Then click on the button that says Create new Feed
twitterfeed1

A form is what you will see next,

twitter-feed-form

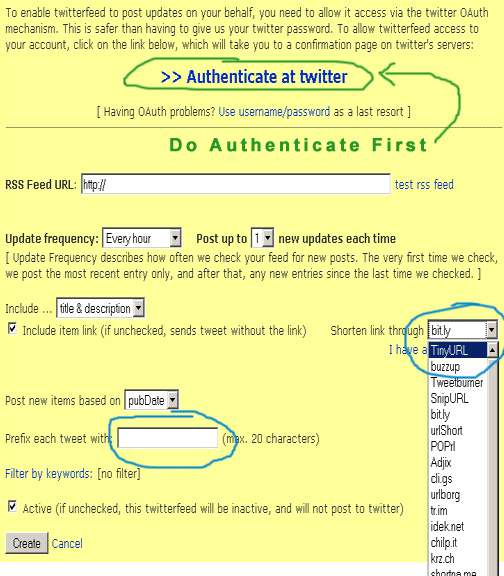
First and foremost click at the link saying Authenticate At Twitter This will tell twitter.com whether twitterfeed  is allowed to access your twitter account or not. After authenticating, fill up the form by following the steps below,

  • In RSS Feed URL type this,

http://tnt-by-stc.blogspot.com/feeds/posts/default

Remember to replace the URL in red with your blog URL

You can also add your Feedburner Feed URL , which will look like this,

http://feeds2.feedburner.com/tntbystc

Again make sure to replace the text in red with your feed title

  • Set the Update Frequency to Every hour and Post up to to 1
  • Write your Blog title in the box next to Prefix each tweet with and check the box just below it
  • For Shorten Link through choose TinyURL
  • Finally check the box at bottom to activate your tweets
  • Hit Create and you are Done!

After your tweet feeds are activated you will see a page as shown below,

twitterfeed1

It will take 30 minutes or less for your feed status to be activated. During this time read further on how to get a Twitter widget for displaying your latest posts in it.

2. Visit twitter.com/widgets

twitter-for-blogger

You will have four options where you can add your twitter widget but since I share blogger Tips and tricks (TNT) I will go for blogger :)

Click Continue to set your twitter widget. You will come across a configuration page as shown below,select-settings-and-copy-tw

You have the choice of showing up to 20 posts on your widget but I would suggest just 5 for better page load time. I would also suggest not to give a title to this widget, we will give it a title later on.

You have two choices to add your cool looking twitter widget to your blog either by clicking the Add to blogger button or grab the code link. I love to add codes to my template myself so I will go for grab the code

Copy the code they provide you,
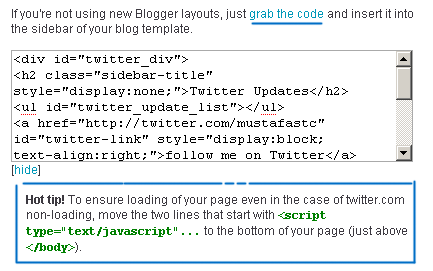
copy-the-code  Note:- Don’t worry about that Hot tip! I am here to take all that headache  :D

Log into your blogger account and go to Layout > Page Elements

Layout

Click on Add a gadget,

add-a-gadget

Choose HTML/JavaScript

html-javascript


Paste the code in this widget and give it a title like “Recent Posts” or “Latest Stories

And your are Done! with a beautiful and unique Recent posts widget like the one at this blog

Feel free to ask tough questions Come forward baby

More

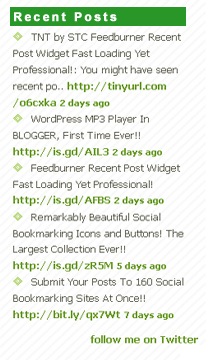
Feedburner Recent Posts Widget For Blogger

Feedburner Recent Post Widget You might have seen recent post widget hanging on the sidebar of several blogs but most often this widgets have a JavaScript Code in it that badly increases the load time of your page. Today we will learn how to add a Recent posts widget offered by  Feedburner to your blogs which is tidy, attractive, unique and most importantly fast loading.
Let me tell you that Feedburner also uses JavaScript but it’s really smart when it comes to page Load time, because the JavaScript is not directly linked to your blog, 50% of the load time is shared by FeedBurner.

More

Remarkably Beautiful Social Bookmarking Icons and Buttons! The Largest Collection Ever!!

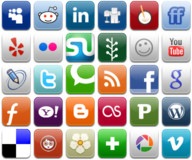
Social-Icons-By-TNT-by-STC What would you call a blog if it is not equipped with beautiful and attractive social bookmarking icons? Of course such a blog will have an ugly user interface. Its not just good and quality content in your blog posts that attract visitors, the fist thing that catches a visitor’s eye is your customized template. People read my posts with interest because I have spent months into making it an interesting spot for knowledge seekers (my readers). Well quality social bookmarking icons play an integral role into giving a pro look to your blog. So lets get some quality bookmarking buttons and icons for free!

Below I have shared Social Bookmark Icons and Buttons from some of the reputed blogs and websites. The download link is available below each Icon set. Feel free to download and do let me know which icon set attracted you the most.


1.  Social Icons by Designreviver.com 

social_icons

download now


2.  Cute Twitter Icon Set by www.smashingmagazine.com

cute-twitters-preview

download now


3.  Aquaticus Social Icon by Quake9

Aquaticus Social-192

download now


4.  Cute Heart Social Icons by www.smashingmagazine.com 

Cute Heart Icons

download now


5.  Cubic Social Icons with Logos at top by www.webfruits.it

maxiconeblog3_lp

 download now

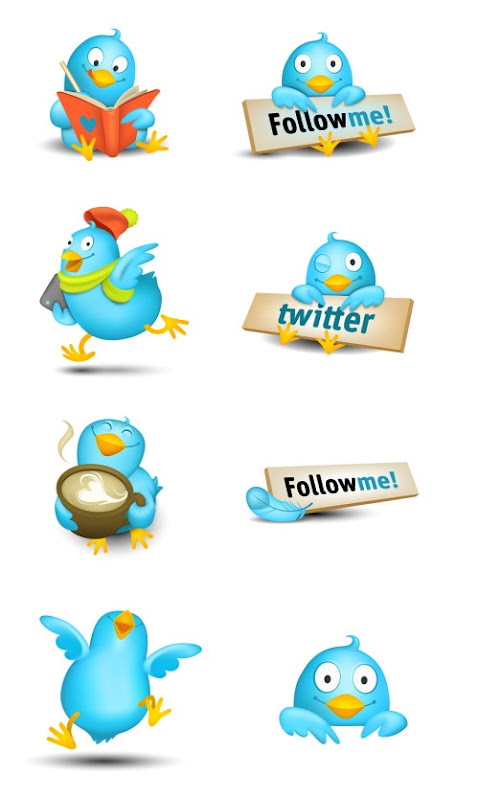
6.  Twitter Boys with Attitude by monkeyworks

Right Click and then select Save Image As/Save Link As To Download the Twitter Boys below,

twitter3

download now

7. The Leaves Fall: A Social Icon Set By www.smashingmagazine.com

the leaves fall

 download now


8.  some Glassy Social Icons by vikiworks.com

socialbookmark

download now


9.   33 Feed Icons by www.zeusboxstudio.com

zeus

download now

10. Twitter Icons by www.vincentabry.com

To download or view  Tweet Icons other than the ones given below Click Here

Right Click and then select Save Image As/Save Link As To Download the Twitter Icons below,

follow-me-250 Twitter-1 Twitter-2 Twitter-3 Twitter-4  Twitter-7 Twitter-27 Twitter-28


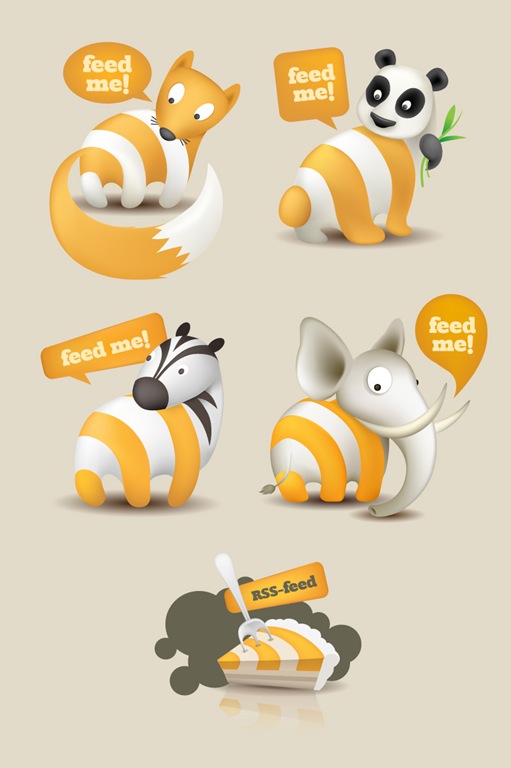
11.  Cute Animal Feed Icons by www.smashingmagazine.com 

Feed me animals

download now

12.   RSS/Feed Icons by www.smashingmagazine.com

feeds

download now


13.  RSS Buttons by iris-design.info

Right Click and then select Save Image As/Save Link As To Download the buttons below,

image027 image021 image023 image025


14.  Animated RSS Feed Icons by abdussamad.com

Right Click and then select Save Image As/Save Link As To Download the Icons below,

feed-icon-animated black-feed-icon feed-icon


15. Beautiful Social balls by www.zeusboxstudio.com
social balls
download now
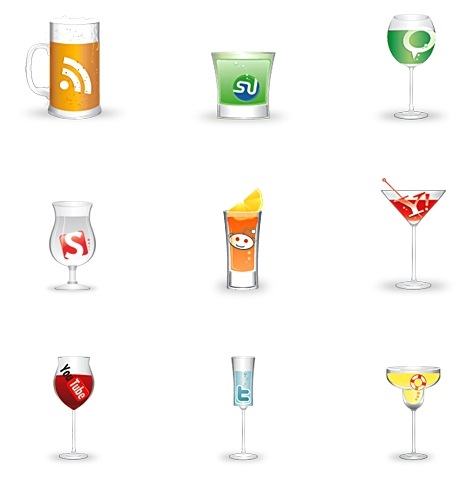
16. Cheers Icon set by www.smashingmagazine.com

cheers

download now
17.  Metallic Steel Social Icons by Webtreats.mysitemyway.com

35__620x620_iconsetc-social-media-icons

download now
18.  Now Finally Some Jumbo size RSS Feed Icons by 0at.org 

To Download Several other Feed Icons like the ones below, Click Here! 

Right Click and then select Save Image As/Save Link As To Download the Icons below,

 bottle_side   halfsphere  lamp  meat notebook orange printer sandwich speaker sucker 


154218d4  Thanks God! The Post ended at last. I am really tired at the moment, will meet you after taking some rest. But you guys do let me know whether TNT by STC’s this post on Social Bookmarking Icons was useful or not.

More