LATEST STORIES

Customize Blogger Comment Form – Make It Possible!

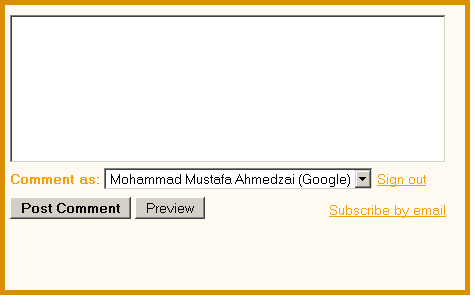
Customize-Blogger-comment-form Today's tutorial is the most demanded and most wished but rarely answered in blogosphere. For some designers customizing the Blogger Comment Form is somehow not possible whilst for others it is tricky but from today onwards InshAllah every blogger will actually be able to customize the Blogger Comment Form in the best way possible! After some trial and errors we actually succeeded in altering Blogger’s official CSS coding. We are happy to have brought you with a tutorial that will indeed enable you to have a customized Comment Form far better than that of Wordpress, Typad etc.

Blogger Comment Box Series
1. Customize Blogger Comment Form

Please have a look at some examples below,

Brick Style Comment Form

Wooden Style Comment Form

Now Hover Your Mouse Cursor at these comment forms for 3-4 seconds to see something different!

Baby Comment Form with message for spammers
Simple Comment Form with message for spammers

Orange Comment Form with message for spammers
We hope you liked this new discovery! Lets now learn how to customize the blogger comment form/box to suit your preferences.

Adding A Customized Comment Form To Your Blog

Note:- The Following CSS code is for the Comment Form With a Baby in it. Other CSS codes will be provided to subscribers only. If you haven’t subscribed yet kindly subscribe now and inform us by leaving a comment with your Email ID.
Follow these steps,
  1. Go To Blogger > Layout > Edit HTML
  2. Check The Box “Expand Widget Templates” at the top right corner.
  3. Search for the code below,                                  Tip:- Press Ctrl + f
<div class='comment-form'>
     4.   Replace this code with the code below,
<div id='mbt-form'>
     5.   Now Search for ]]></b:skin>
     6.   Just above ]]></b:skin> paste the CSS code below,
#mbt-form iframe{
background:#ffffff url(https://blogger.googleusercontent.com/img/b/R29vZ2xl/AVvXsEgFlBaaG18DlVf41JWPTj2wYuhgAQd-2Mf3dwDrdZyCaysz3CGl93PR7h3csOmIQN-50W_p4t3_s7k_osmMktM-IgRptBCD90DELqsbR6zu52PRedWa4O7EP3qVn1T5cAtQyGGPAuXZl2nM/s400/plz-do-not-spam1.gif) no-repeat bottom right;
border:7px solid #C7C7C7;
padding:5px; font:normal 12pt "ms sans serif", Arial; color:#7EB2AC; width:450px; }
#mbt-form iframe:hover{
background:#ffffff url(https://blogger.googleusercontent.com/img/b/R29vZ2xl/AVvXsEhWVezw0UbheeKpQXNiSishGgIliEiiSX_hu5Gi3OXFPG6Ik6_0PH-QVhPIE3hvVfzVhLPPRbChLLuNTE31BQUjeMvRrNcOl9VGtcXdPSwEJut-3jUUJE_plh6kFsGKKEGTkvTltJ5vmBVJ/s400/plz-do-not-spam2.gif) no-repeat bottom right; border:7px solid #7EB2AC;
}
#mbt-form a{
color:#7EB2AC;
}
     7.     Save your template and view your blog to see a different touch :>

Customize The Blogger Comment Form To Suit Your Blog Layout

Now Lets discuss the important areas in the CSS code above to help you customize your Blogger comment form according to your preferences.
There are three important areas, which are,
#mbt-form iframe
#mbt-form iframe:hover
#mbt-form a
Here are the details for each section
1.    Customization For Active Mode
#mbt-form iframe
This part is responsible for the active appearance of comment box when mouse cursor is not hovered on it. It includes the following style properties,
background: This property is responsible for the background color, background image and background image’s position. Where,
  • #ffffff : This is the background color. You can change it using our Color Chart
  • url : This is the URL for the background image. I used the baby in this case. You can change this image with anything you like.
  • bottom right: This positions the background image. I positioned the baby on bottom right corner. You can position the image at bottom right or bottom left or top right or top left
border: This CSS property defines the border size/width, style and color of the comment box. I have set these values for the Comment form in active mode(not on mouse over),
  • border size to 7px,
  • border style to solid. You can choose solid, dotted, dashed etc. See this page on border styles
  • border color to  #C7C7C7. Use our CSS Color Chart for using a different color.
padding: This CSS property is responsible for the distance/gap between the Comment Form border and its text area. You can increase this value if you wish to insert an image at top right or top left corner of the form.
font:  This CSS property defines the boldness, font family and the size of the text. I have set the following for the text “Comment as:”
  • boldness to normal,
  • size to 12pt 
  • font family to  "ms sans serif". If in case the browser doesn’t has the "ms sans serif" font then I have set Arial as a backup.
color: This property defines the color of the text “Comment as:” . Use our Color Chart for changing the text color.
width: This property sets the width of your Comment Form. You can see the comment from of my blog is wider than normal because I have adjusted its width. Set the width of your comment form a bit smaller than that of your post width. You can find your post width by finding the following code in your template (Edit HTML)
.post

2.  Customization For Mouse Hover Mode Now lets discuss the CSS properties for the form’s appearance when a mouse cursor is hovered on it.
#mbt-form iframe:hover
It has almost the same explanations for background and border as we discussed earlier. Setting these two CSS properties will effect the second image only that appears on mouse hover.
3. Customization For The Link Colors
#mbt-form a
This part defines the color of these two links -> “Sign out” and “Subscribe by email” . These links appear at bottom right corner of every Blogger Comment Form.
color: This sets the link color. Set a link color as contrast to the background color.

That’s All!
I hope this tutorial will be of great help to bloggers and designers. We request everyone to kindly link back if you wish to share this unique tutorial with your readers and friends. We thank you for your patience.
Any question is welcomed :>
More

How To Delete Blogger Comments –Trash Icon Bug fixed!

COMMENT-BUG-FIXED Many bloggers who use un-official blogger templates can’t delete the comments on their blog because they can’t see a trash icon or dustbin icon. You may have seen this bug in Buster template and Church template also. Many people have suggested various methods of deleting the comments without a trash icon but the question is why can’t you see a Comment Trash Icon?


It was always a headache for me on how to solve this issue. With the release of Cute Box template AlhamdulillAh my developing skills some how improved. The reason why you can not see a trash icon below your post comments while logged into blogger account is more simple than we expected. There is a small piece of missing code that is responsible for making the dustbin icon appear. This is what you need to do,

Delete Blogger Comments Easily By Fixing The Trash Icon Bug

  • Go To Blogger > Layout > Edit HTML
  • Check The “Expand Widget Templates” box at the top-right-corner
  • And search for this piece of code,

<dd class='comment-footer'>

  • Just below <dd class='comment-footer'>  paste the code below,

<span class='comment-timestamp'>
              <b:include data='comment' name='commentDeleteIcon'/>
            </span>


  • Save your template and preview any of your blog post to see a beautiful trash icon below each comment :)

 comment-trash-icon

Troubleshoot

If for some reason you still can not see a trash icon below your blog comments then follow an additional step.

  • Inside Edit HTML search for ,

<b:includable id='commentDeleteIcon' var='comment'>

  • You will find a similar big chunk of code below it,

<b:includable id='commentDeleteIcon' var='comment'>
  <span expr:class='&quot;item-control &quot; + data:comment.adminClass'>
    <a expr:href='data:comment.deleteUrl' expr:title='data:top.deleteCommentMsg'>
      <img src='http://www.blogger.com/img/icon_delete13.gif'/>
    </a>
  </span>
</b:includable>

If you are not able to see a trash icon then most probably this piece of code will not be well scripted. Simply replace your current code with the bolded green code shared above.

  • Finally save your template to really see a trash icon this time!

That’s All!

I hope this will be a great sigh of relief to many Blogger designers and developers. This will surely help in dealing spam comments more effectively. I request everyone to kindly link back if you wish to share this tutorial with your readers.

More

Social Bookmarking Widget For Blogger – Bookmark and Share homepages!

Bookmarking-Widget For Blogger With the release of Cute Box blogger Template I also released some useful blogger widgets which includes a Bookmarking Widget For your blog’s homepage. This widget helps readers to bookmark your blog’s homepage on their favourite bookmarking services like Google bookmark, Stumbleupon, Delicious, Digg etc. It contains icons from  our Circular Style Social Media Icon Set. This is how this widget looks like,


Bookmarking Widget

To add this widget to your blogs, follow these steps,

  1. Go To Blogger > Layout
  2. Click Add a Gadget or Add a Page element
  3. Choose HTML/JavaScript
  4. Inside HTML/JavaScript paste the code below,

<center><tr>
<td valign="top" width="50%">
<table border="0" cellpadding="0" cellspacing="0" width="222">
<tbody>
<tr>
<td width="28" height="30"><img border="0" width="25" src="https://blogger.googleusercontent.com/img/b/R29vZ2xl/AVvXsEgsoTUQMW2jw_7JvU2rLOfQM4fzPOwNsTYYfw60mrNWmPQU9QVVFWBPma_YbMzYyAUvPKu9K4QbVYytTervPgHGnGzoeF2HJUVVDnU1TtlcQoINkmwFTccegLolOmL7rKkIQec7p6wSSs8/s400/FACEBOOK.png" height="25"/></td>
<td height="30"><a href="http://www.facebook.com/sharer.php?u=http://YOUR-BLOG-NAME.blogspot.com" target="_blank" rel="nofollow">Share on Facebook</a></td>
</tr>
<tr>
<td height="30"><img border="0" width="25" src="https://blogger.googleusercontent.com/img/b/R29vZ2xl/AVvXsEgkN_zgKKeRr-dkt5kLcOoJoy2139ZS4SQ8EyAYHeuWqgdJfDr_EtJno7VjFwkunn5ng6GUQVrvXnZb_YS-llmsqTnOMgEGfwHqEK3tHvudw9nFFMlNGeMYiRhxCueCDbtkH1DOwaWZ26E/s400/TWITTER.png" height="25"/></td>
<td height="24">
<a href="http://twitthis.com/twit?url=http://YOUR-BLOG-NAME.blogspot.com">Share on Twitter</a></td>

</tr>

<tr>
<td height="30"><img border="0" width="25" src="https://blogger.googleusercontent.com/img/b/R29vZ2xl/AVvXsEjdk43aDWKi0iq1PRn0wkWYwPRWoOI67dkCvuENj0jQPFHt8yoiAfWQGoqpBLRmLkAxoJ988FhBJY-GUM1OlWyZvb8nnEM6HPFm2eeiP4LPbzn06r7W8sVqbcNATMFBwcXNLx91nMDjc-I/s400/STUMBLE-UPON.png" height="25"/></td>
<td height="30"><a href="http://www.stumbleupon.com/submit?url=http://YOUR-BLOG-NAME.blogspot.com" target="_blank" rel="nofollow">Share on StumbleUpon</a></td>
</tr>
<tr>
<td height="30"><img border="0" width="25" src="https://blogger.googleusercontent.com/img/b/R29vZ2xl/AVvXsEg6-w5AfTyyDQ-ZIO255j8WOMsfni5XS22QSYmHkYL_5TNMqONpDmtfjVNEbtZQE5u3W3LZrEa8UjwxNlBVSa88wiSpeQbu_A1qEWqONcbtNd-NEcZ5fyCZZYSuB41meaIw3rb2_GuaGEs/s400/DELICIOUS.png" height="25"/></td>
<td height="30"><a href="http://del.icio.us/post?url=http://YOUR-BLOG-NAME.blogspot.com" target="_blank" rel="nofollow">Share on Delicious </a></td>
</tr>

</tbody>

</table>
</td>
<td valign="top" width="50%">
<table border="0" cellpadding="0" cellspacing="0" width="222">
<tbody>
<tr>
<td width="28" height="30"><img border="0" width="25" src="https://blogger.googleusercontent.com/img/b/R29vZ2xl/AVvXsEh7h0UN16kxuCcUSeh_jzY3hdMqvwbelHoFQO9NllldtcsBHqEW1vD8xNer7S9_vV8QEWqJKm7cCM3t2Vy_wdqwkZfoX5P09cGsUDkMwMn93d7pj1KHtLVcuuS6u_gdoA99jfBhr661vpo/s400/DIGG.png" height="25"/></td>
<td height="30"><a href="http://digg.com/submit?phase=2&url=http://YOUR-BLOG-NAME.blogspot.com" target="_blank" rel="nofollow">Share on Digg </a></td>
</tr>

<tr>
<td height="30"><img border="0" width="22" src="https://blogger.googleusercontent.com/img/b/R29vZ2xl/AVvXsEjPPR3bhnOXbHZRd6HoPsJjQyhfRx4nnhzmJtxk5H7bd0SDcGehEkrQjNxo1iDSgkvBU93UonYsKULIUymNDV-kydLm__ThIiPId4Bp_zslnV2-4Iw3ewp33eRm1QEIBlkLsaKZlI1UJfc/s400/Google-icon.jpg" height="22"/></td>
<td height="30"><a href="http://www.google.com/bookmarks/mark?op=edit&amp;output=popup&amp;bkmk=http://YOUR-BLOG-NAME.blogspot.com" target="_blank" rel="nofollow" title="Bookmark this blog on Google">Bookmark on Google</a></td>
</tr>
<tr>
<td height="30"><img border="0" alt="Email" width="21" src="https://blogger.googleusercontent.com/img/b/R29vZ2xl/AVvXsEgiNGhGecrMc1gr4OS1dSypQWLsJK6WJxLh2IdSpdL-BVo9lUM4j9tbjVGcsBAGVV348xbXgOfutzoahUCT0jGCqLhl-mAUb8c6z5dDYqRcdOfRY6sHKzdnZSCoPXMhQytDUpP63pjjzo1v/s400/Email+Orange_128.png" height="22"/></td>
<td height="30"><a href="http://feedburner.google.com/fb/a/mailverifyuri=tntbystc&amp;loc=en_US" target="_blank" rel="nofollow">Receive Email Updates</a>
</td>
</tr>
</tbody>
</table></td></tr></center>

Remember to replace YOUR-BLOG-NAME  with your Blog’s good name and the Subscription Link i.e http://feedburner.google.com/fb/a/mailverifyuri=tntbystc&amp;loc=en_US with your own Feedburner subscription link. You can find your subscription link by going to the following location in your feedburner account, Publicize > Email Subscription . Just below Email Subscription page you will find a code as shown below,

subscription-link


Finally save your widget and preview your blog to see the new change!

More

Feedburner Recent Comments Widget For Blogger

 Feedburner Recent Comments WidgetJust few months back I wrote a post on how to add a Recent Posts Widget by Feedburner to your Blogger and Typad blogs and today we will learn a similar tutorial based on a really attractive and fast loading Recent Comments widget offered by Feedburner. This widget is really fast loading in a sense that it is well scripted and the JavaScript it uses is stored on feedburner’s server so there will be no load time delay on your blog. You have seen this widget hanging on my sidebar inside the multi-tab widget. So lets learn how to add it to blogger.

To add the Recent comments Widget By Feedburner to your blogs follow these steps,

Burn Your Comment Feed At Feedburner

1.  Login To Your Feedburner Account. Incase if you don’t have one simply sign up for a free account.

2.  Insert your Comment Feed URL inside the Feedburner box. The URL for Blogger Blogs will be like this,

http://YOUR-BLOG-NAME.blogspot.com/feeds/comments/default

Replace YOUR-BLOG-NAME with your blog’s good name.Burn-your-feed-box

3.  Press the Next Button and you will be brought to a new page. Simply insert an easy memorable Feed title and feed address. I prefer both to be the same.

Feed-title-and-address


4.  Press Next and then fill the two options on the new page as shown below,

choose-feed-options


5.  Finally press the Next button again and you have successfully burnt your comment feed!

  • Now click the publicize button just at the top

publicize-button

  • On the left sidebar click BuzzBoost

buzzboost

  • Hit The Activate button on the right pane

activate

  • Then fill in the options as shown below,

recent-comments-widget-sett

Its advisable to leave all boxes unchecked.

  • Finally click the save button and get your HTML code which will be just at the top of the page as shown below,

Widget-code

  • Done!

Adopt a similar procedure for Typad

How to Add the Recent Comments Widget To Blogger

Now once you have copied the code for your recent comments widget then simply follow the steps below,

  1. Log into Blogger
  2. Go To Layout
  3. Click Add a Gadget or Add a Page element
  4. Choose HTML/JavaScript Widget
  5. Now paste the Feedburner code inside this widget and hit save
  6. Done!

Finally Preview your template to see it hanging on your sidebar :>

More